You will need
- Step ladder
- Tape measure
- Plumb line or bubble level
- Pencil
- Large scissors
- Pasting brush
- Pasting table
- Straight edged object
- Utility knife
- Seam roller
- Wallpaper brush
- Clean damp cloth
- Wallpaper paste
NOTE: Read your wallpaper instructions to ensure that you choose an appropriate paste. The choices are; regular cold water paste that is mixed with water, wheat based paste for mixing with water and various pre-mixed PVA type adhesives to suit wall coverings of different weights and types.
Preparation
Prepare your work area by clearing away any breakable objects and covering the area with dustsheets. Strip the old wallpaper (you may need to rent a steamer to help with this) and prep walls to be smooth. For additional advice, read our how to remove wallpaper article.
Particularly on uneven walls, consider cross-lining the walls first with lining paper. If the walls are newly plastered, ensure that they have fully dried out before papering and apply a suitable coating beforehand; acrylic primer, or “size”. When wallpapering a room it is best to have painted all woodwork beforehand – doors, architraves, windows and baseboards.
Step 1
Cutting and pasting
1. To begin, using a bubble level, make a pencil mark as a guide for ensuring your wallpaper is hung vertically.
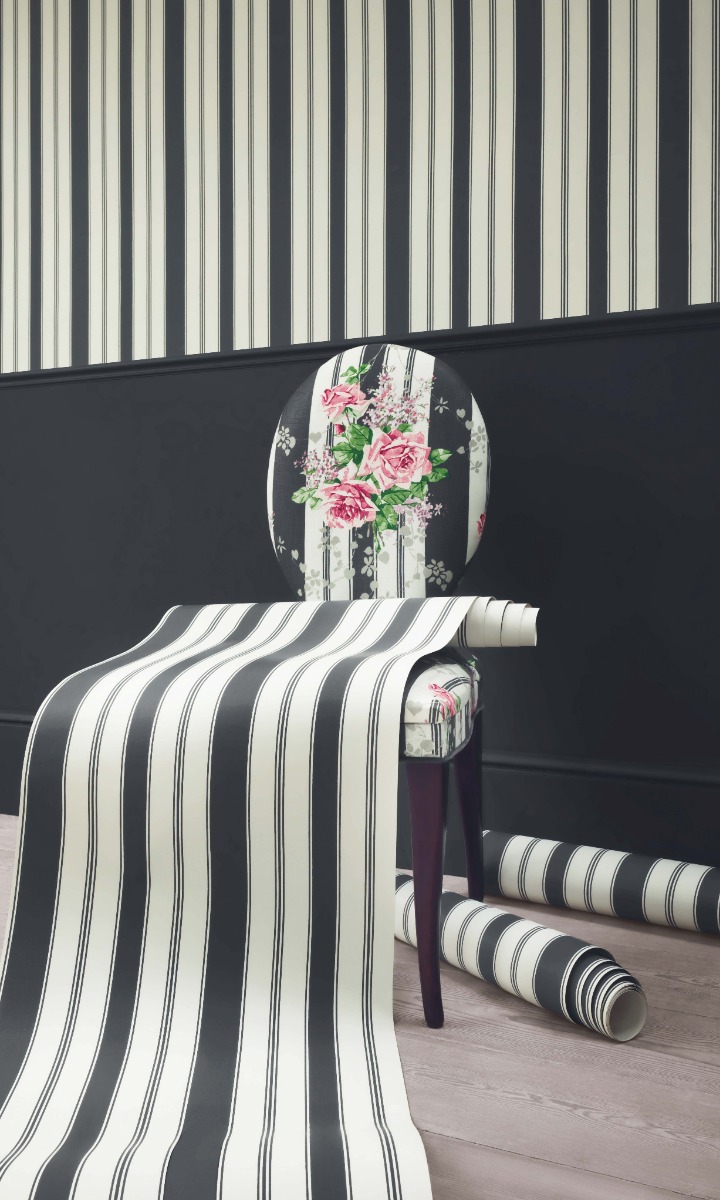
2. Hold up your wallpaper (at the starting corner of your room) to the top of the wall. Checking the pattern position and ensuring it is the right way up, cut the first drop with a trim allowance of 1.9" to the top and the bottom.
3. Anchor the cut length of paper down on your pasting table, and carefully brush paste over the back; covering the edges evenly.
Tip: Do not flick the pasting brush back over the edges, as this can result in paste getting on the front of the paper.
4. Fold the ends of the length of paper into the middle (paste side to paste side) and then fold in half. Lay aside to allow the paste to soften the paper for a suitable time – refer to manufacturer’s instructions for more information.
Tip: When you are confident, you may cut a couple of drops in advance, so that you reduce any waiting time for the paste to condition the paper. Be sure to consider pattern match and obstacles here.
Step 2
Hanging the first drop
1. Once your first drop of paper is ready, climb your stepladder holding a top corner in each hand and allow the top fold of paper to unfold against the wall (paste side to the wall).
2. Carefully smooth the top of the paper against the wall, with your trimming allowance above the position of the top line of papering. Ensure the paper is hanging vertically, true to your pencil line.
3. Working outwards from the center of the paper and downwards, use a wallpaper brush to smooth the paper onto the wall removing any air bubbles and avoiding creasing.
4. When you have reached nearly halfway down the drop of the paper, use both hands to release the bottom fold of paper, so that the whole drop is now unfolded.
5. Continue to smooth the paper onto the wall until you reach the bottom line of papering.
6. Check that the paper is hanging vertically and the pattern is correctly aligned before using a blunt straight edge to score along the top and bottom papering lines. Peel back the top edge of the paper from the wall and trim with large scissors along the score line, before smoothing back the paper. Repeat at the bottom edge.
Tip: Be careful not to cut the paper too short. In awkward spaces, it is sometimes easier to trim with a utility knife.
7. Clean off any paste that may have got onto the surface of the paper with a clean damp cloth.
Step 3
Hanging the second drop
1. When you are satisfied with the first drop, hold up your uncut roll of paper to match the pattern to the edge of the completed drop, marking the roll of paper 1.9" beyond where top and bottom of the second drop will finish.
2. Cut the second drop and hang in exactly the same way as the first drop, but make sure the edge abuts neatly with the edge of the first drop and that the pattern matches exactly.
3. Use a seam roller over the join between drop one and drop two to flatten the seams together and ensure the paper edges are stuck firmly to the wall. Immediately clean off any paste that may come through the join.
4. Continue with your further drops.
Fixtures and fittings
Option 1
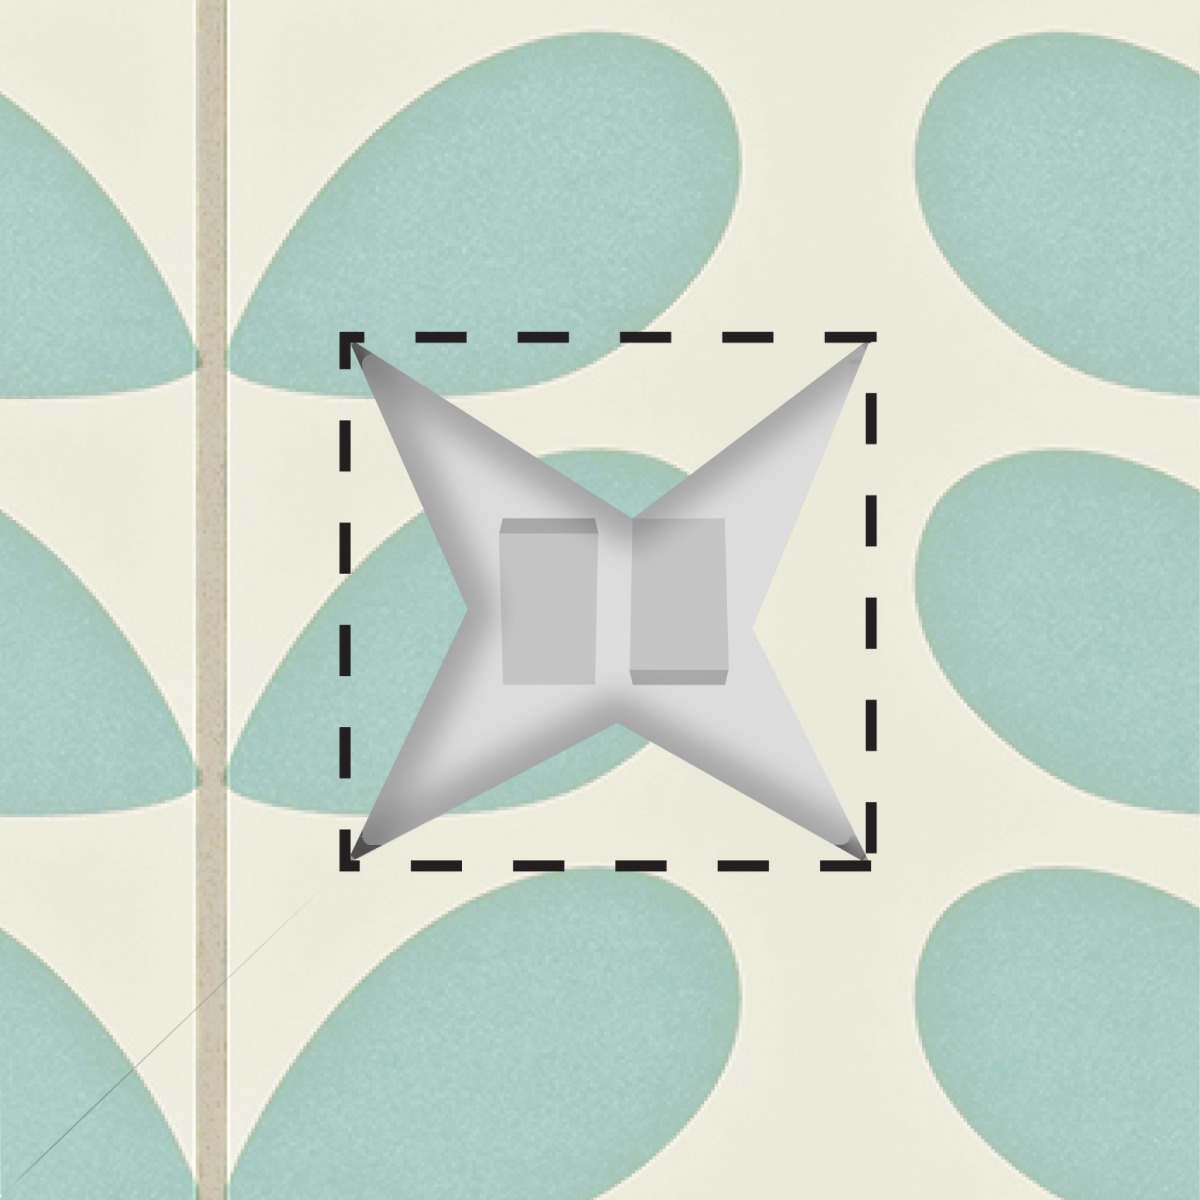
Cut around the fixing. When you come across a fixing, such as a switch or socket, paper over the top and cut a cross in the paper. Trim the excess a little at a time being careful not to overcut. Flatten the paper back against the wall and using a utility knife cut neatly around.
Option 2
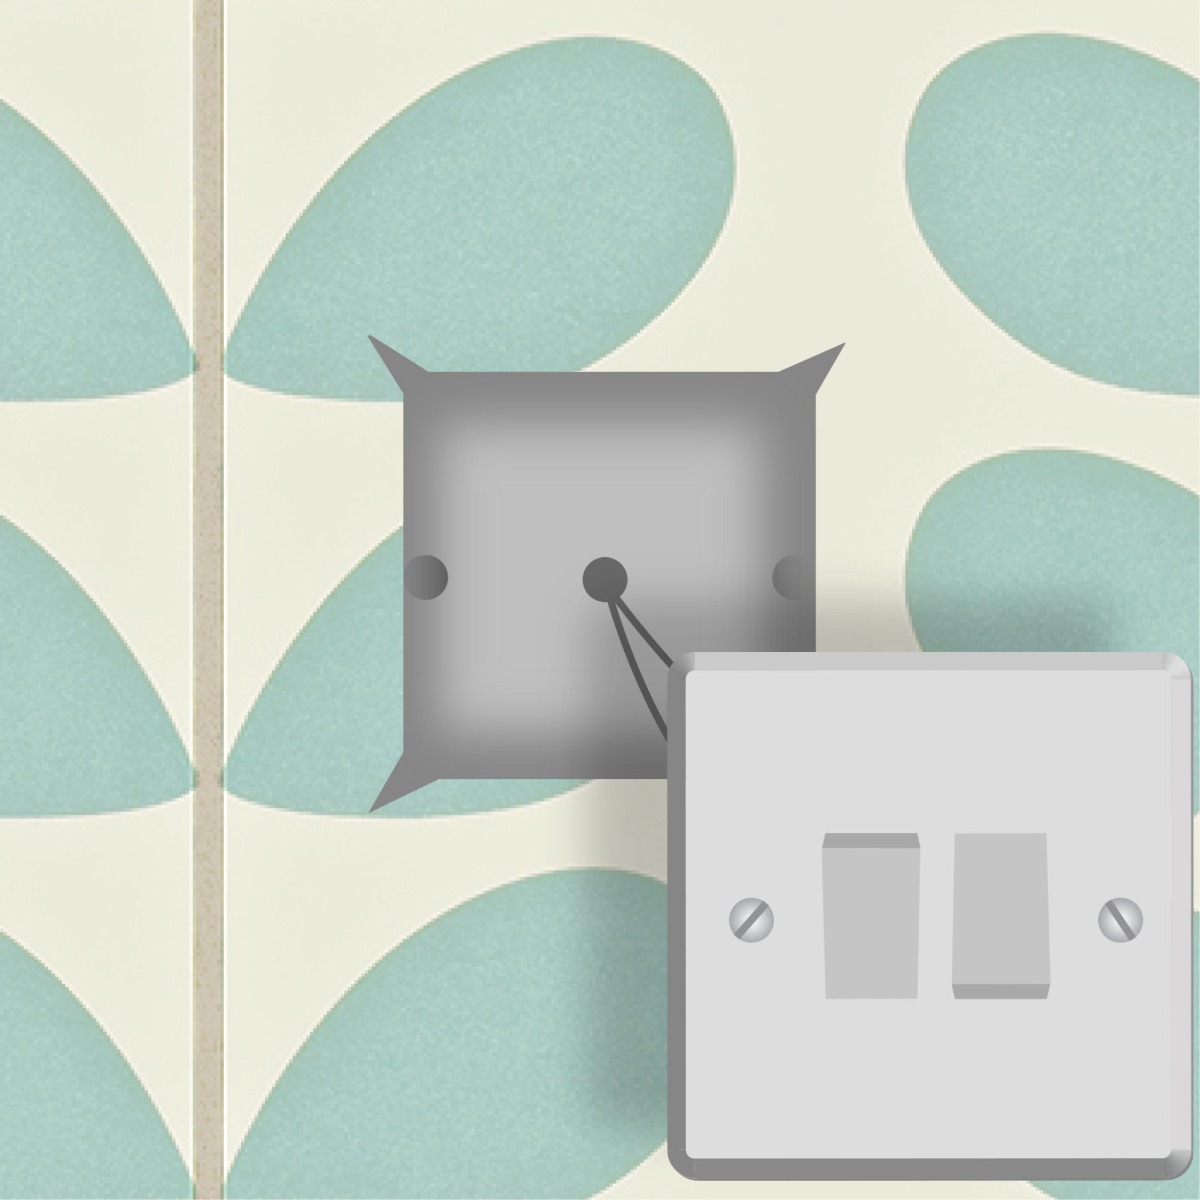
Unscrew the fixing. The neatest finish for light switches or sockets is to unscrew the switch/socket plate from the wall, feed it through the hole that you have made in the paper and then refit the plate on top of the paper. It is important that you first ensure that you have isolated the electric supply.
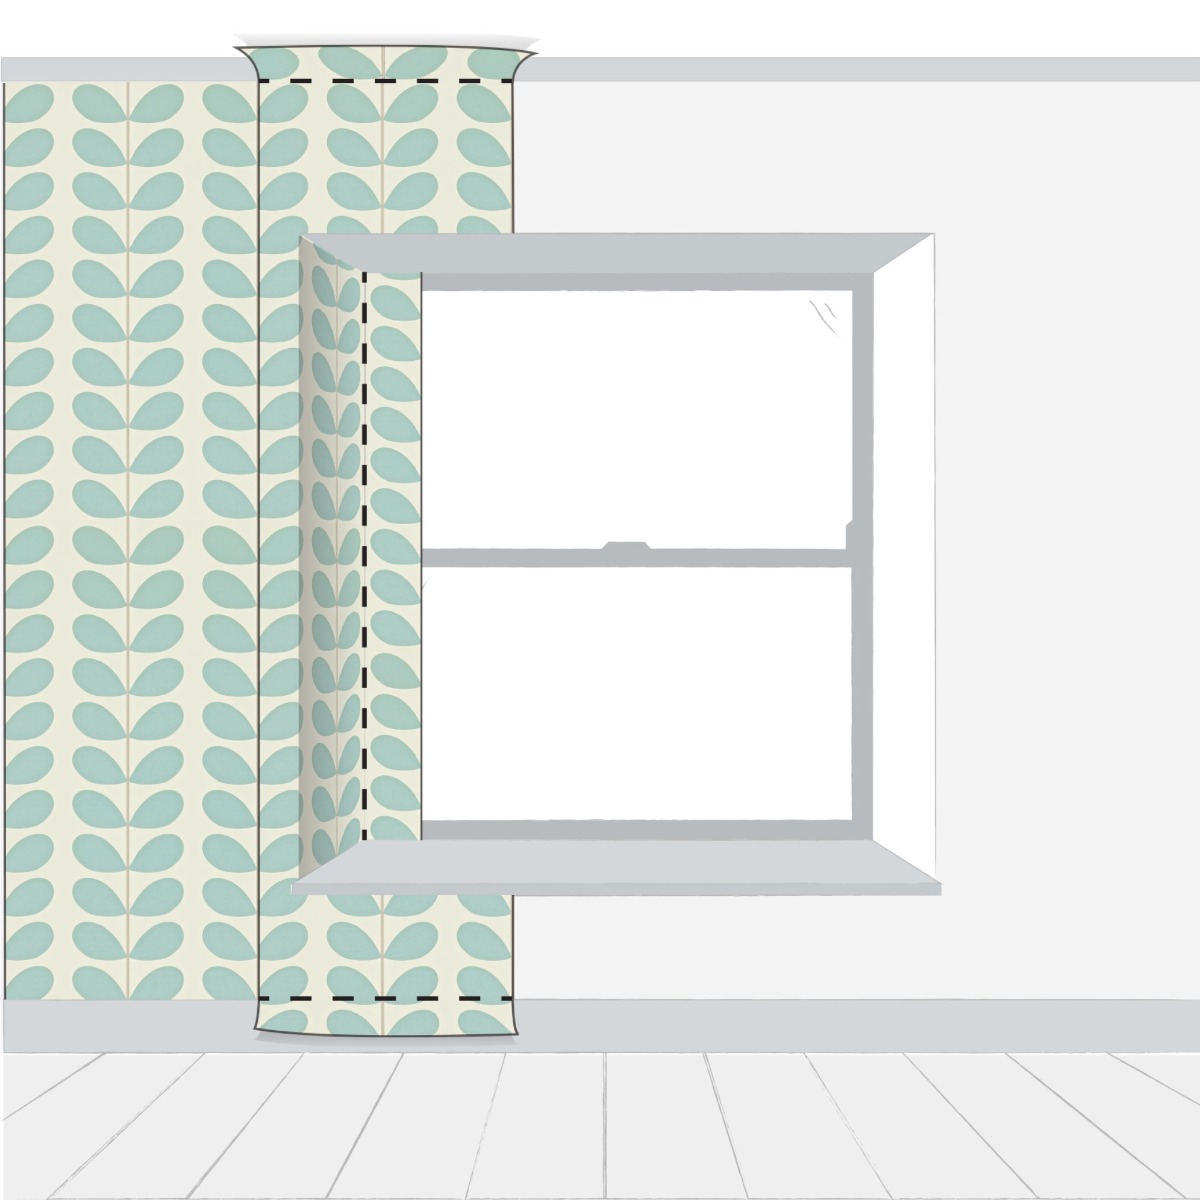
Window reveals and doors
Tip: You will need to paper around the side of the reveal and the underside of the reveal (soffit) as well as the wall above and below the window. The position of the window may influence where you start your first drop of wallpaper, so you avoid having a join just on the edge of the window reveal.
Step 1
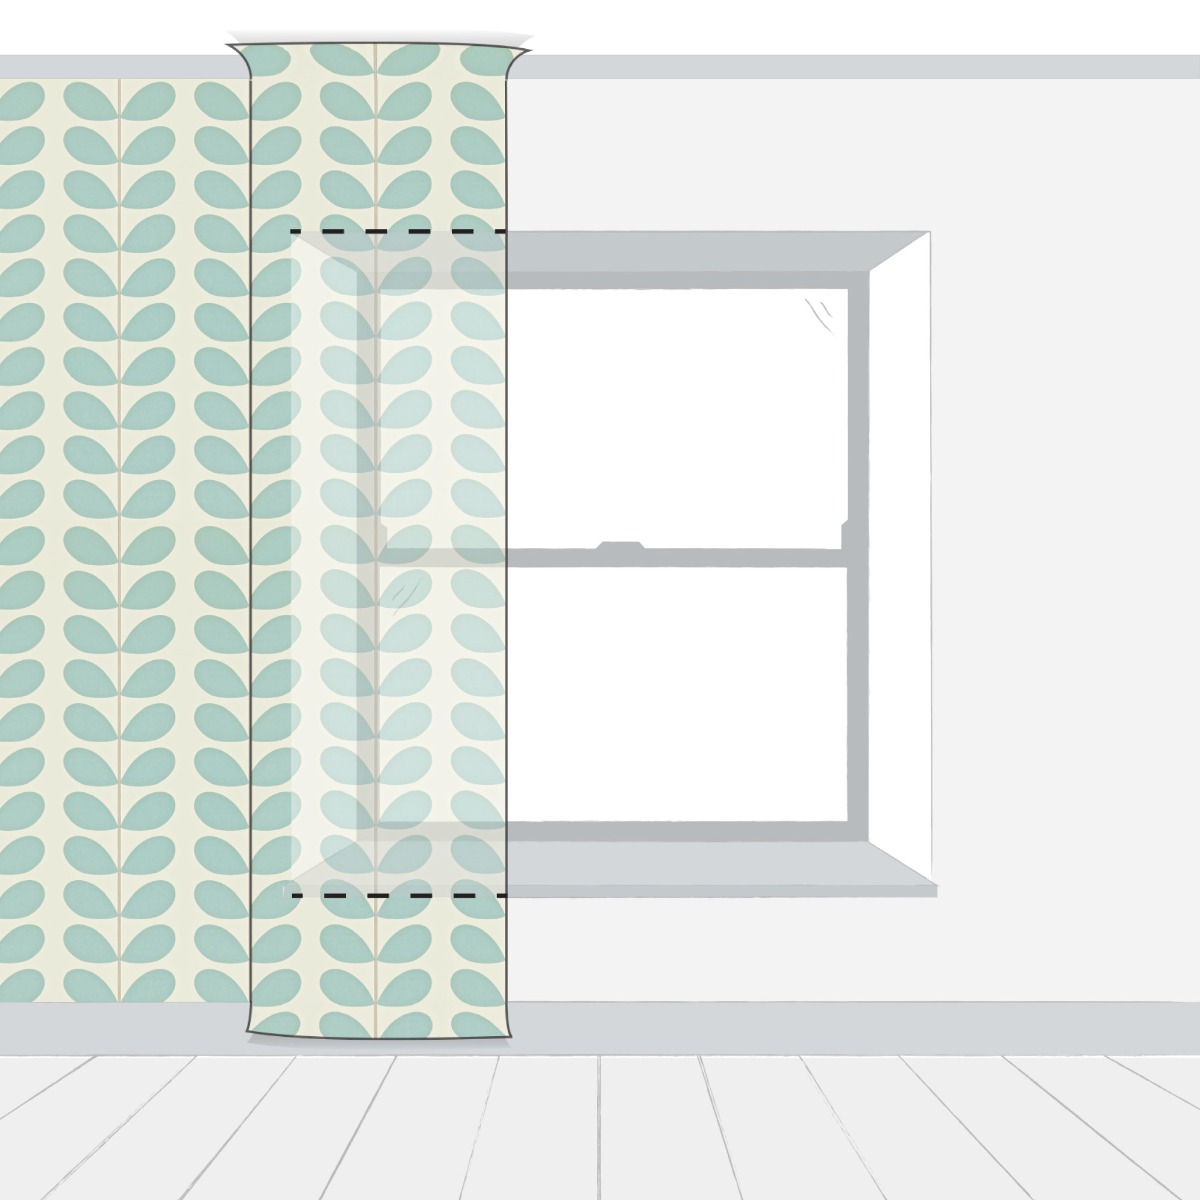
1. The drop that meets the window should be cut as usual to fit at the top and bottom of the wall. Hang the drop in the usual way; covering over the front of the reveal.
2. In line with the top of the reveal, cut across the paper horizontally until you meet the side edge of the reveal.
3. Repeat along the sill level.
4. Fold the paper around into the reveal and trim to the edge of the window frame.
5. Finish hanging the drop to the areas above and below the window reveal and trim as before.
Step 2
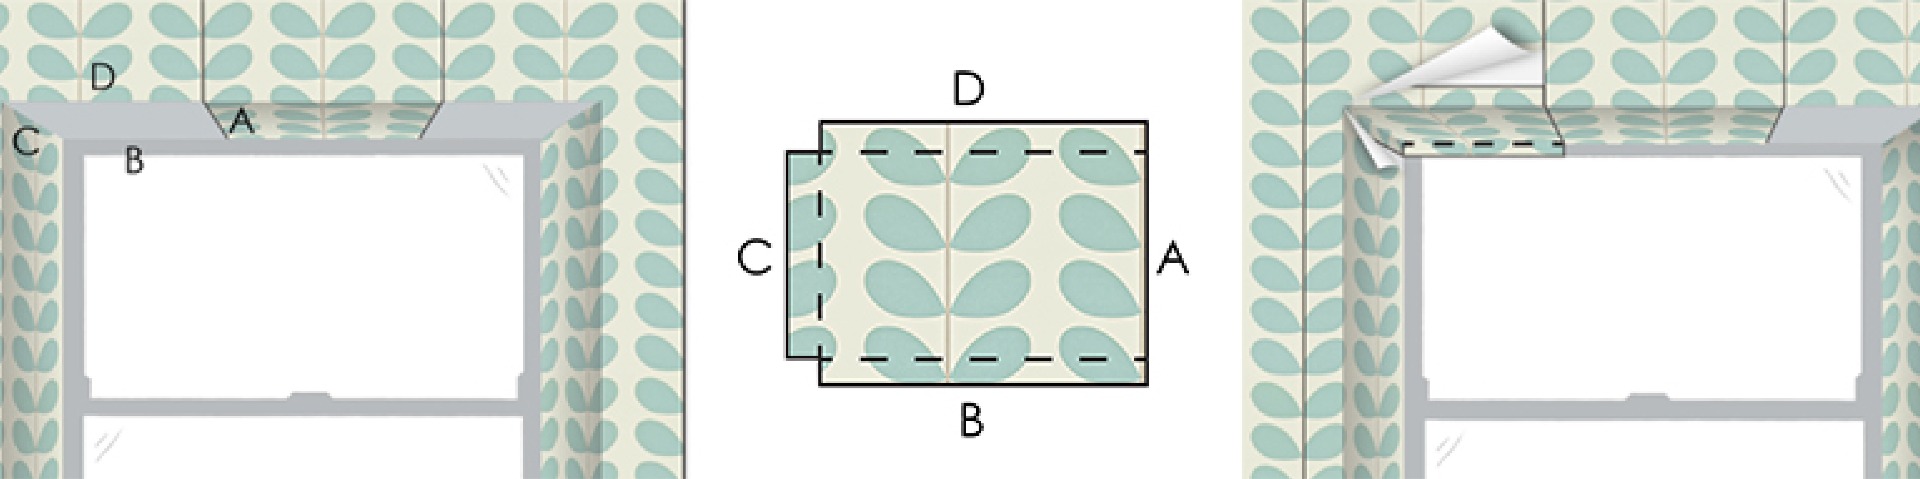
1. For central window drops, continue papering across the width of the window reveal, ensuring that the drops are vertically aligned and the pattern is matched. Wallpaper drops above the window should paper around from the wall to the underside of the reveal (soffit).
Tip: You may have roll ends or offcuts that can be useful for these smaller areas.
2. When you get to the second side of the window reveal, follow the same procedure as for the first side.
3. You will now need to infill the areas in the soffit corners which are not yet papered. Hold a piece of wallpaper up to the area to be covered, matching the pattern edge (A) to the edge of the adjacent drop (A). Mark out the paper, adding a 1.2" allowance to the 3 other sides (B, C, D) of the infill piece, and cut. Paste and hang, first matching the pattern on the uncut side (A).
4. Now, trim into the window frame (B). For the remaining 2 sides (C, D) of the infill, carefully peel back the paper that you have previously hung to the reveal edge and soffit. Tuck the allowance of the infill under, snipping the corner of the infill to enable it to fold, and smooth the peeled paper back down.
Step 3
1. You will now need to infill the areas in the soffit corners which are not yet papered. Hold a piece of wallpaper up to the area to be covered, matching the pattern edge (A) to the edge of the adjacent drop (A). Mark out the paper, adding a 1.2" allowance to the 3 other sides (B, C, D) of the infill piece, and cut. Paste and hang, first matching the pattern on the uncut side (A).
2. Now, trim into the window frame (B). For the remaining 2 sides (C, D) of the infill, carefully peel back the paper that you have previously hung to the reveal edge and soffit. Tuck the allowance of the infill under, snipping the corner of the infill to enable it to fold and smooth the peeled paper back down. Note: Recent wallpapering will take a few days to dry out and during this time is prone to damage.
How to repair snagged or damaged wallpaper
Snags can be repaired by applying a patch of pasted paper in place of the damage. To do this, take a new section of paper and hold up to damaged area; matching the pattern. Cut through both the new section and the paper underneath, then remove the cut away paper from the damaged area and paste in the new matched patch.
